


Montipora capitata spawning and larval rearing protocol
This protocol details the methods for collecting Montipora capitata bundles during spawning, fertilizing gametes, and rearing and settling larvae in Hawai’i during the summer months.
Best practices for spawning and larval collection in Montipora capitata corals in Hawai’i
These methods are modified from those developed by the Coral Resilience Lab at HIMB.
1. Collection
-
Gametes can be collected using two methods: direct collection from colonies in buckets or scooping gametes from the surface of the water in Kaneohe Bay (“wildtype”).
-
Scooping wildtype collections occurs by scooping gametes from the surface on boats.
- Montipora capitata released gametes during the new moon in the summer months in Hawaii. Typically release is heavy for 1-2 nights with lighter release on 1 night either side.
- At peak bundle release on nights 1-3 after the new moon (in 2022 release was on the 29th-30th of June). Bundles are scooped from the ocean surface with handheld nets. Nets are constructed out of tupperware boxes with mesh on the side and bottom attached to a long PVC handle. Bundles are gently scooped and then rinsed out of the collection buckets into 5-gallon buckets or coolers.
- Spawning typically occurs at 8:40-9:15 pm. There is some variation depending on the day/colony.
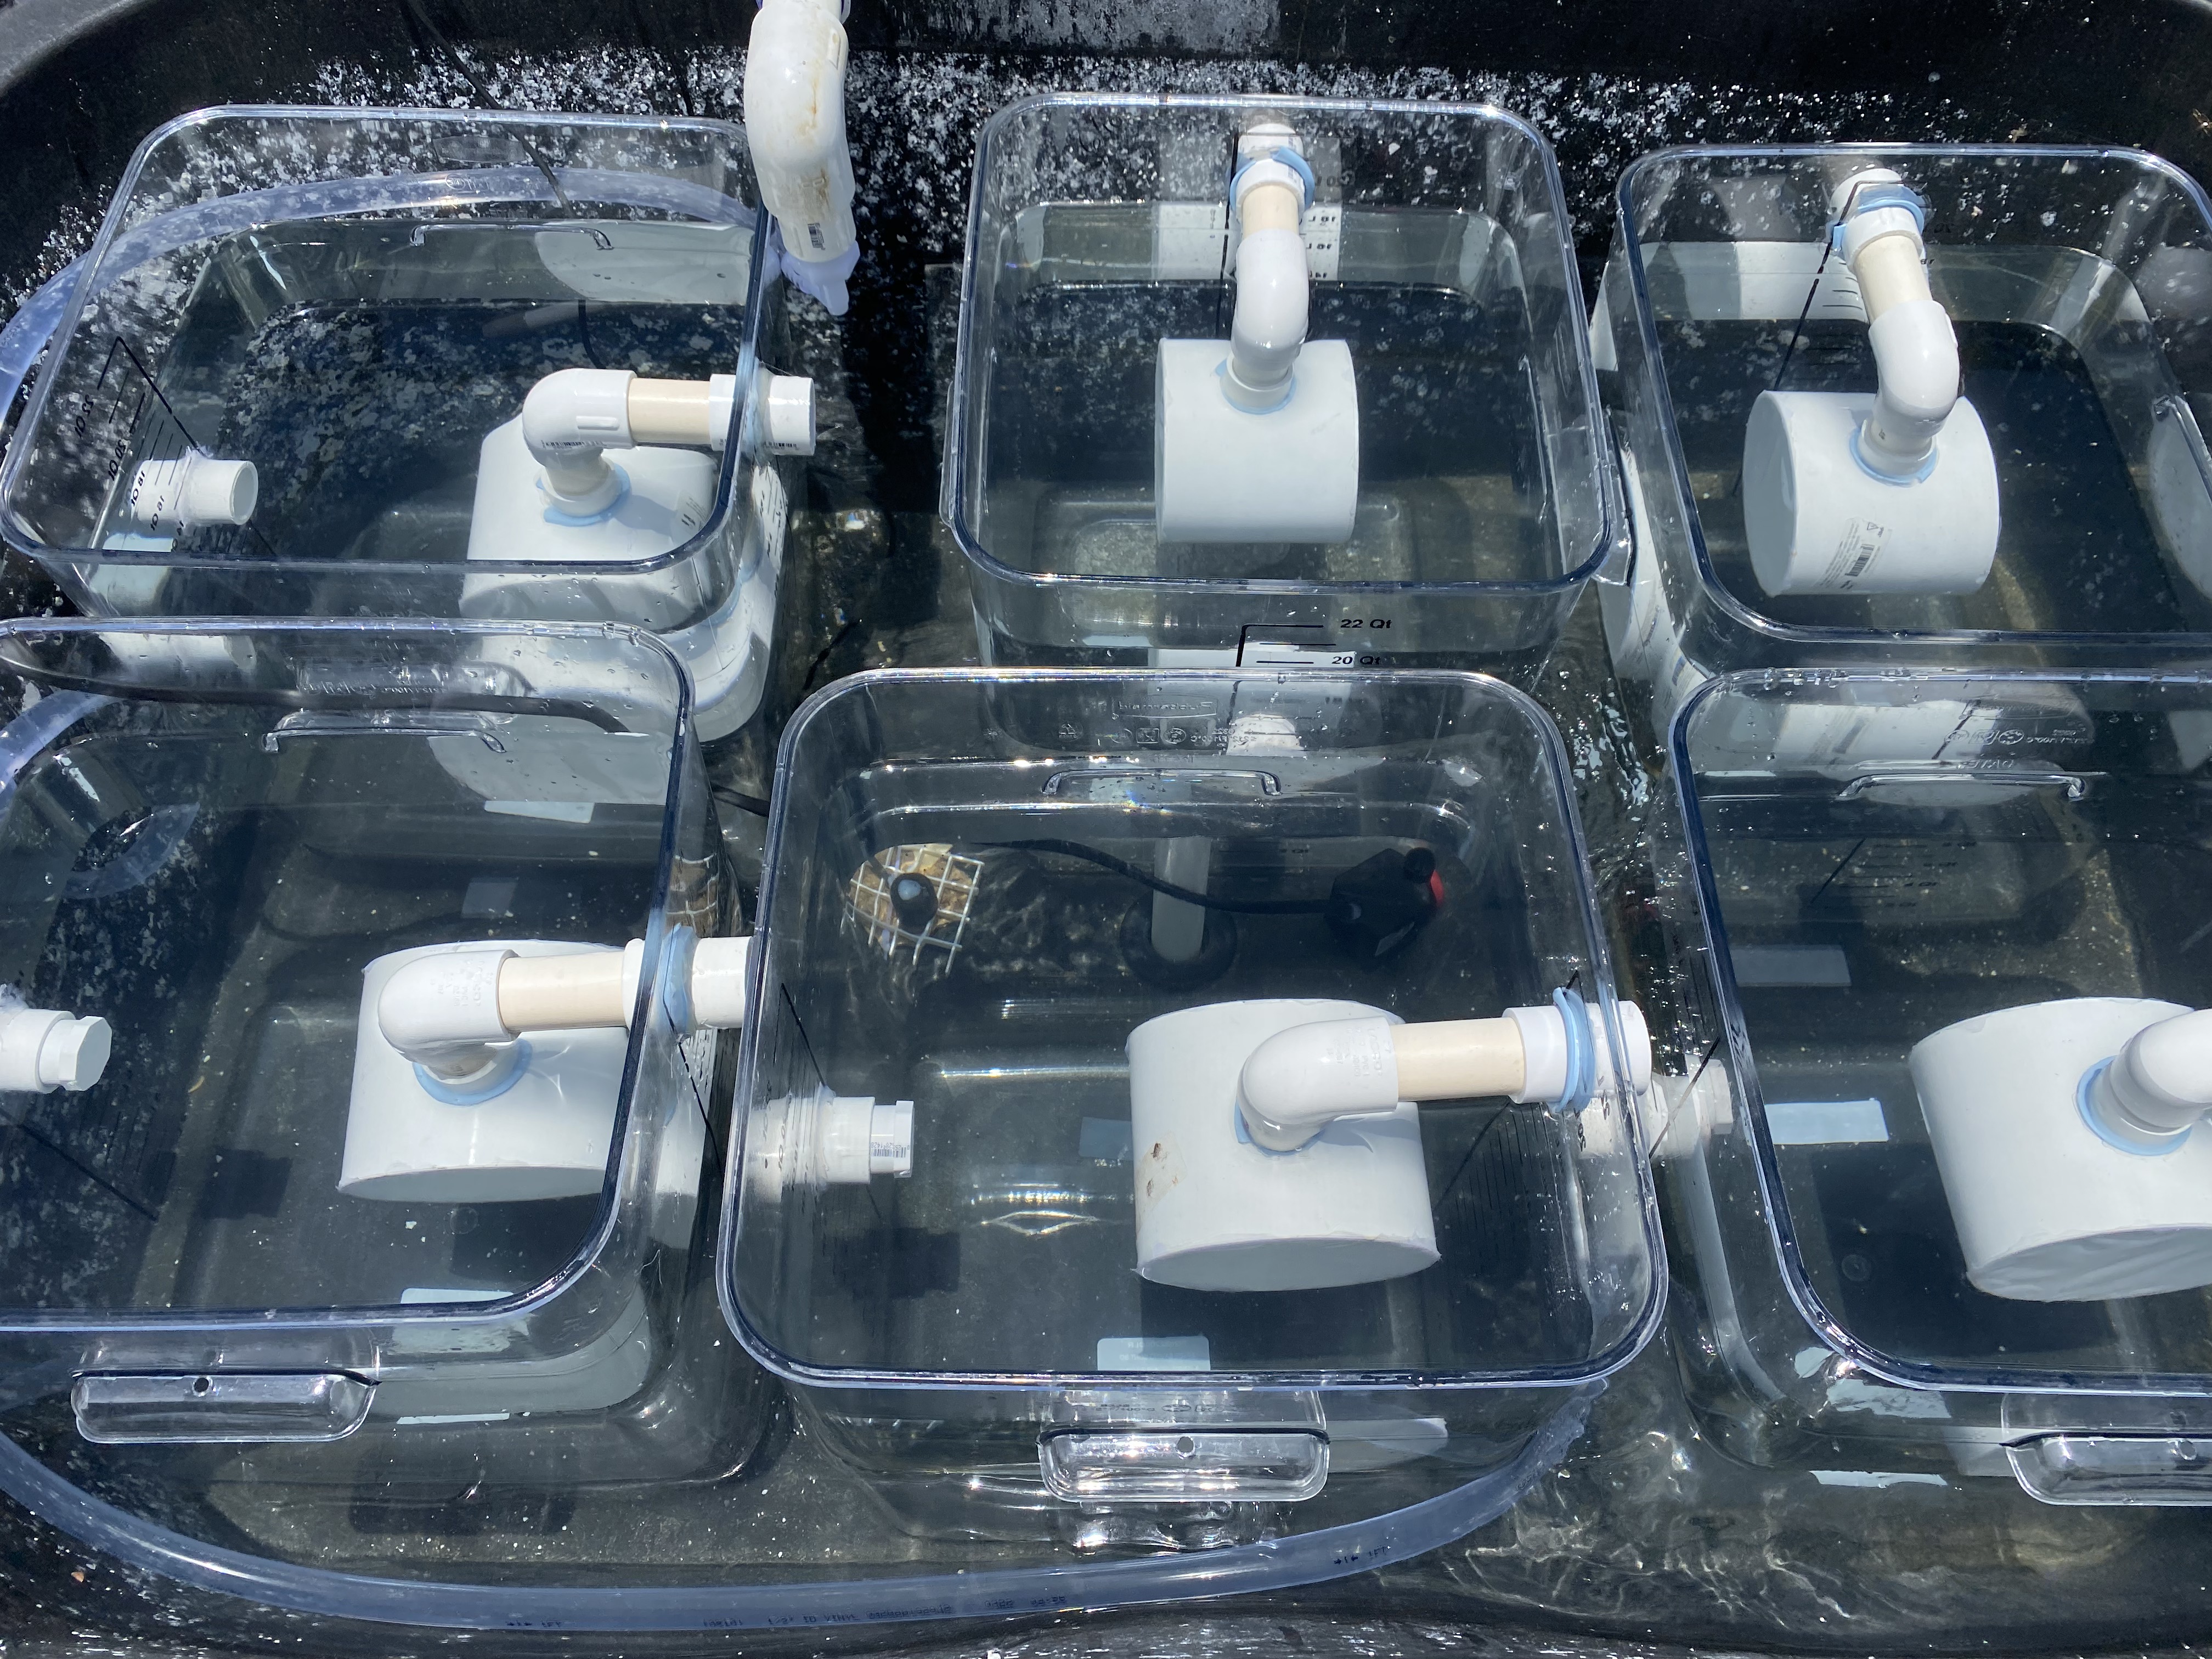
- Prior to gamete collection, fill larval rearing chambers (e.g., conicals, buckets, bins) about ½ full of filtered seawater. Turn off incoming water flow. Cover containers if it is raining to avoid accumulation of fresh water.
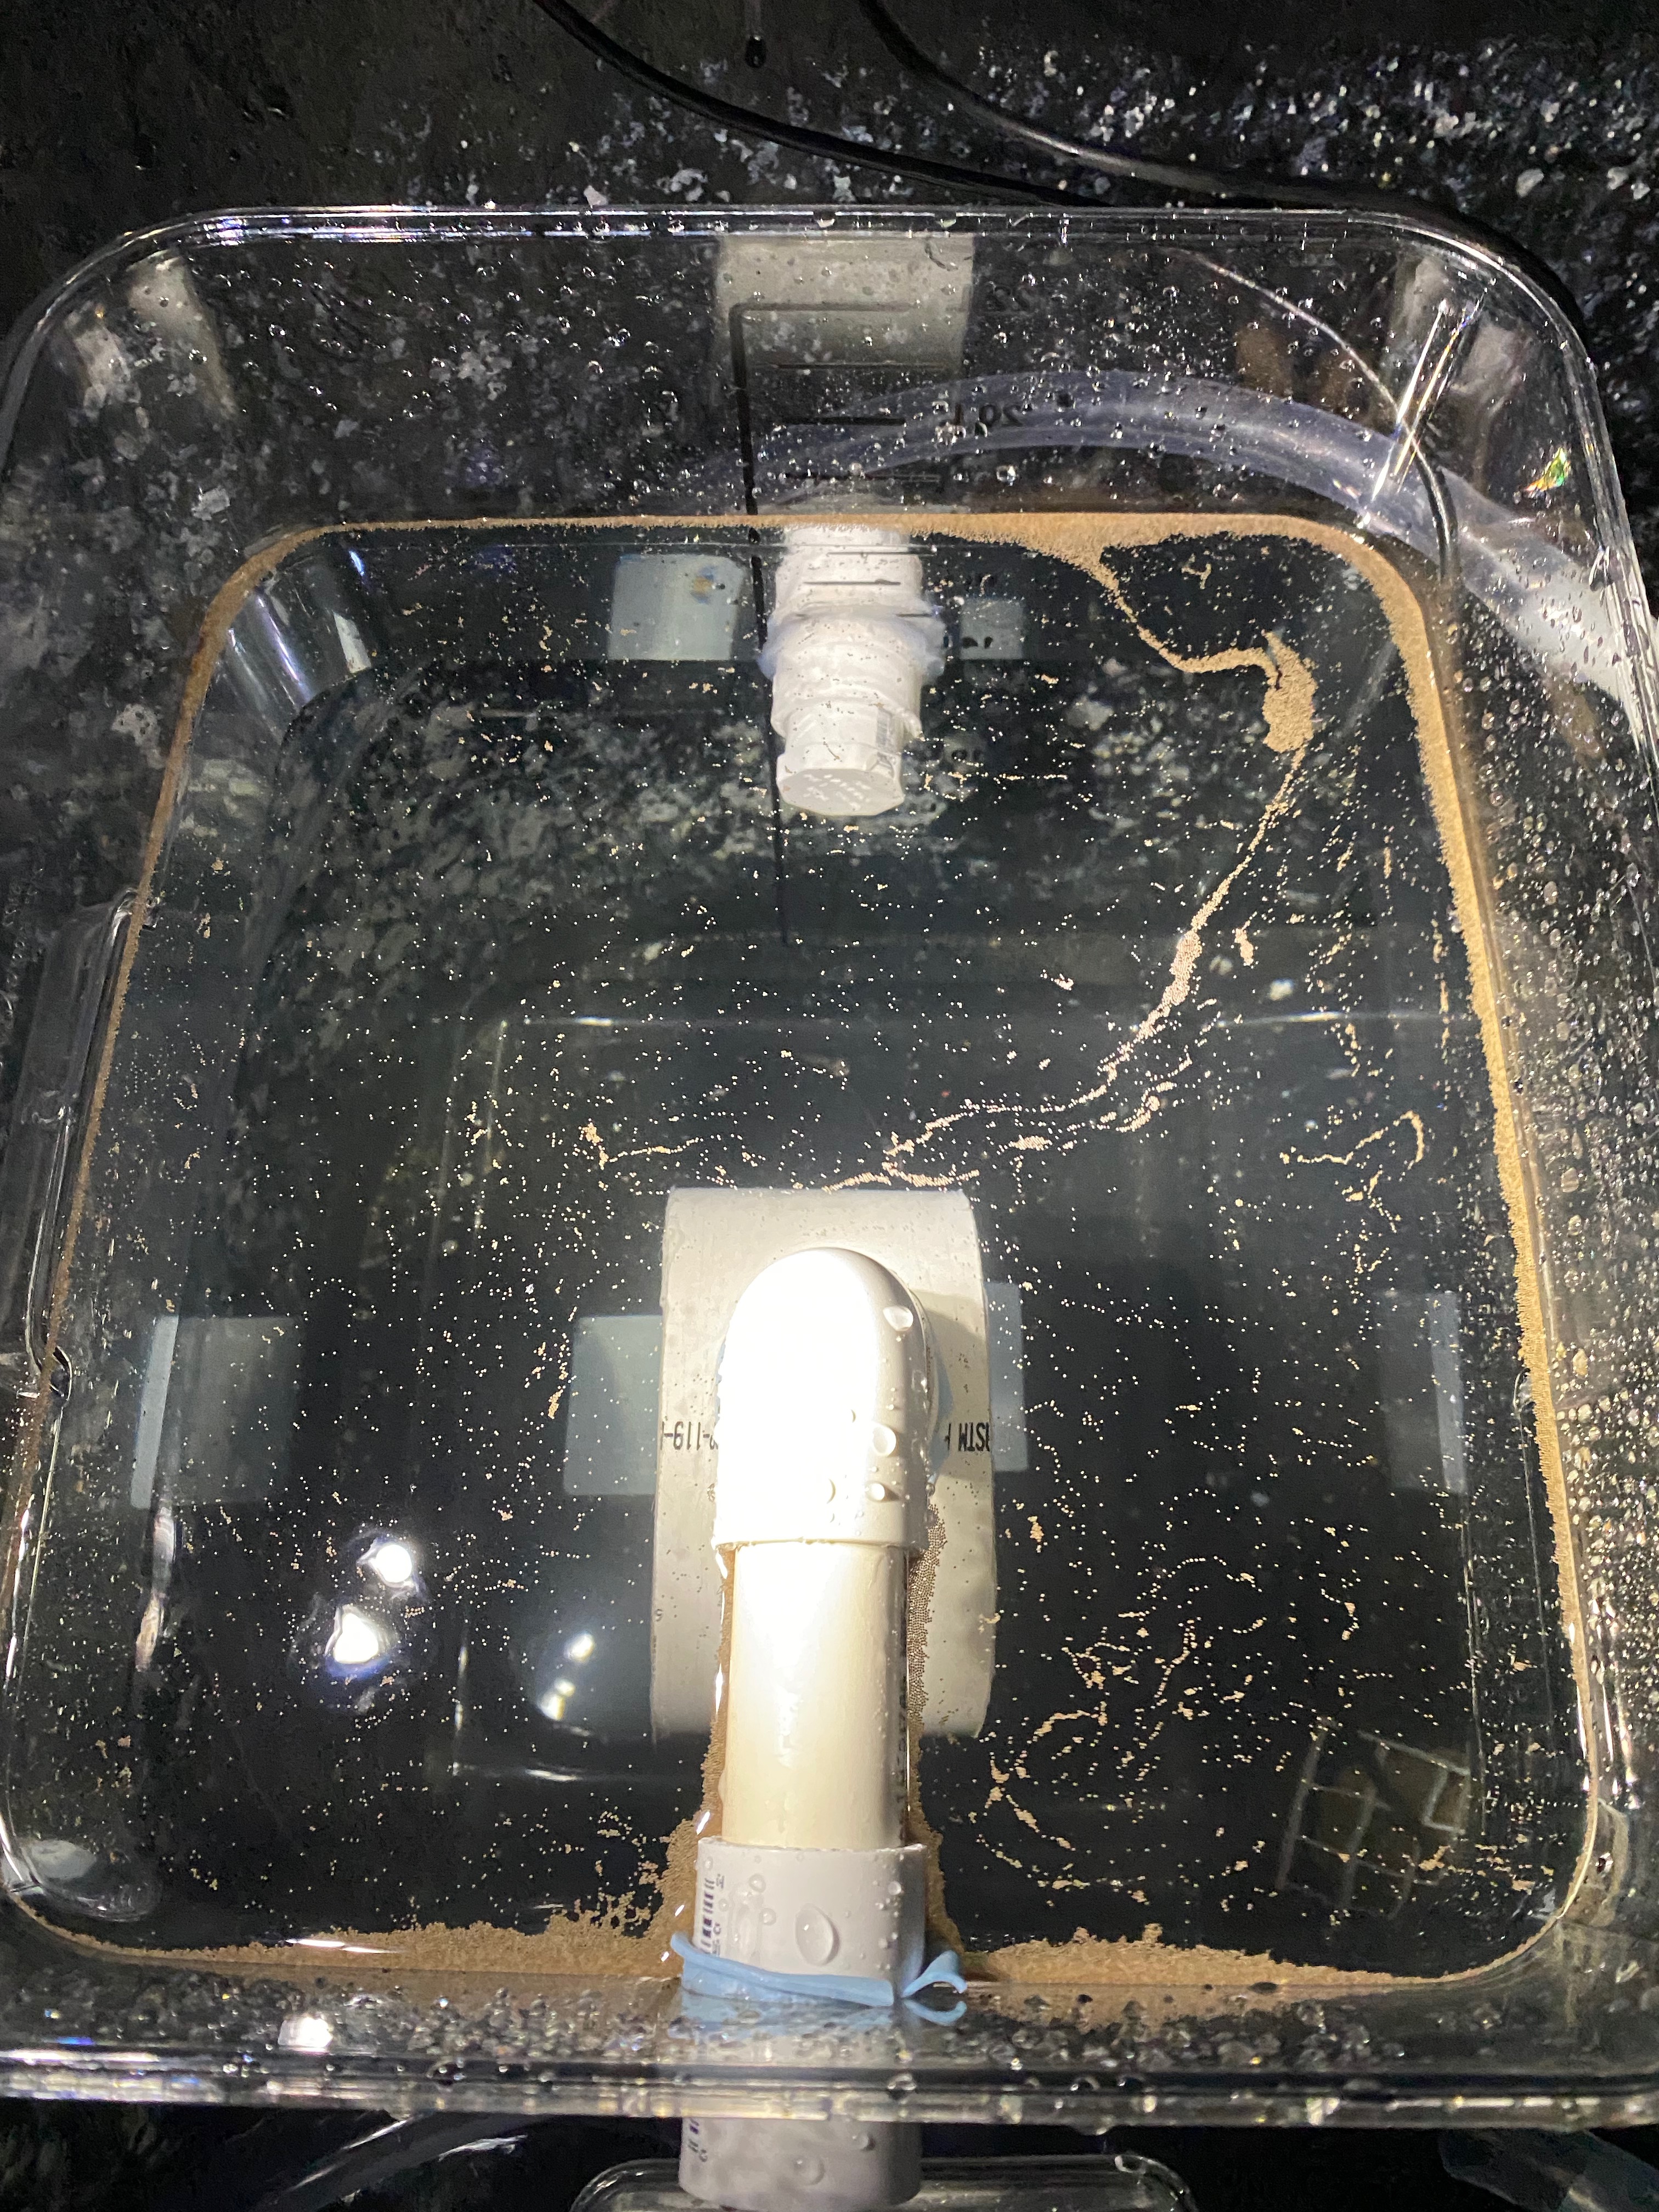
- In this protocol, we are using “squaricals”, which are 20L food safe plastic containers equipped with banjo filters.
2. Fertilization
- After collecting bundles, aliquots of 5mL bundles are placed in 50mL falcon tubes with 35-40mL pre-filled with 1 micron filtered seawater.
- Allow falcon tubes to sit on their side to allow for fertilization.
- Bundles will start to break anywhere from 15-60 minutes after collection. Gently rock tubes to help bundles break apart every 10-15 minutes.
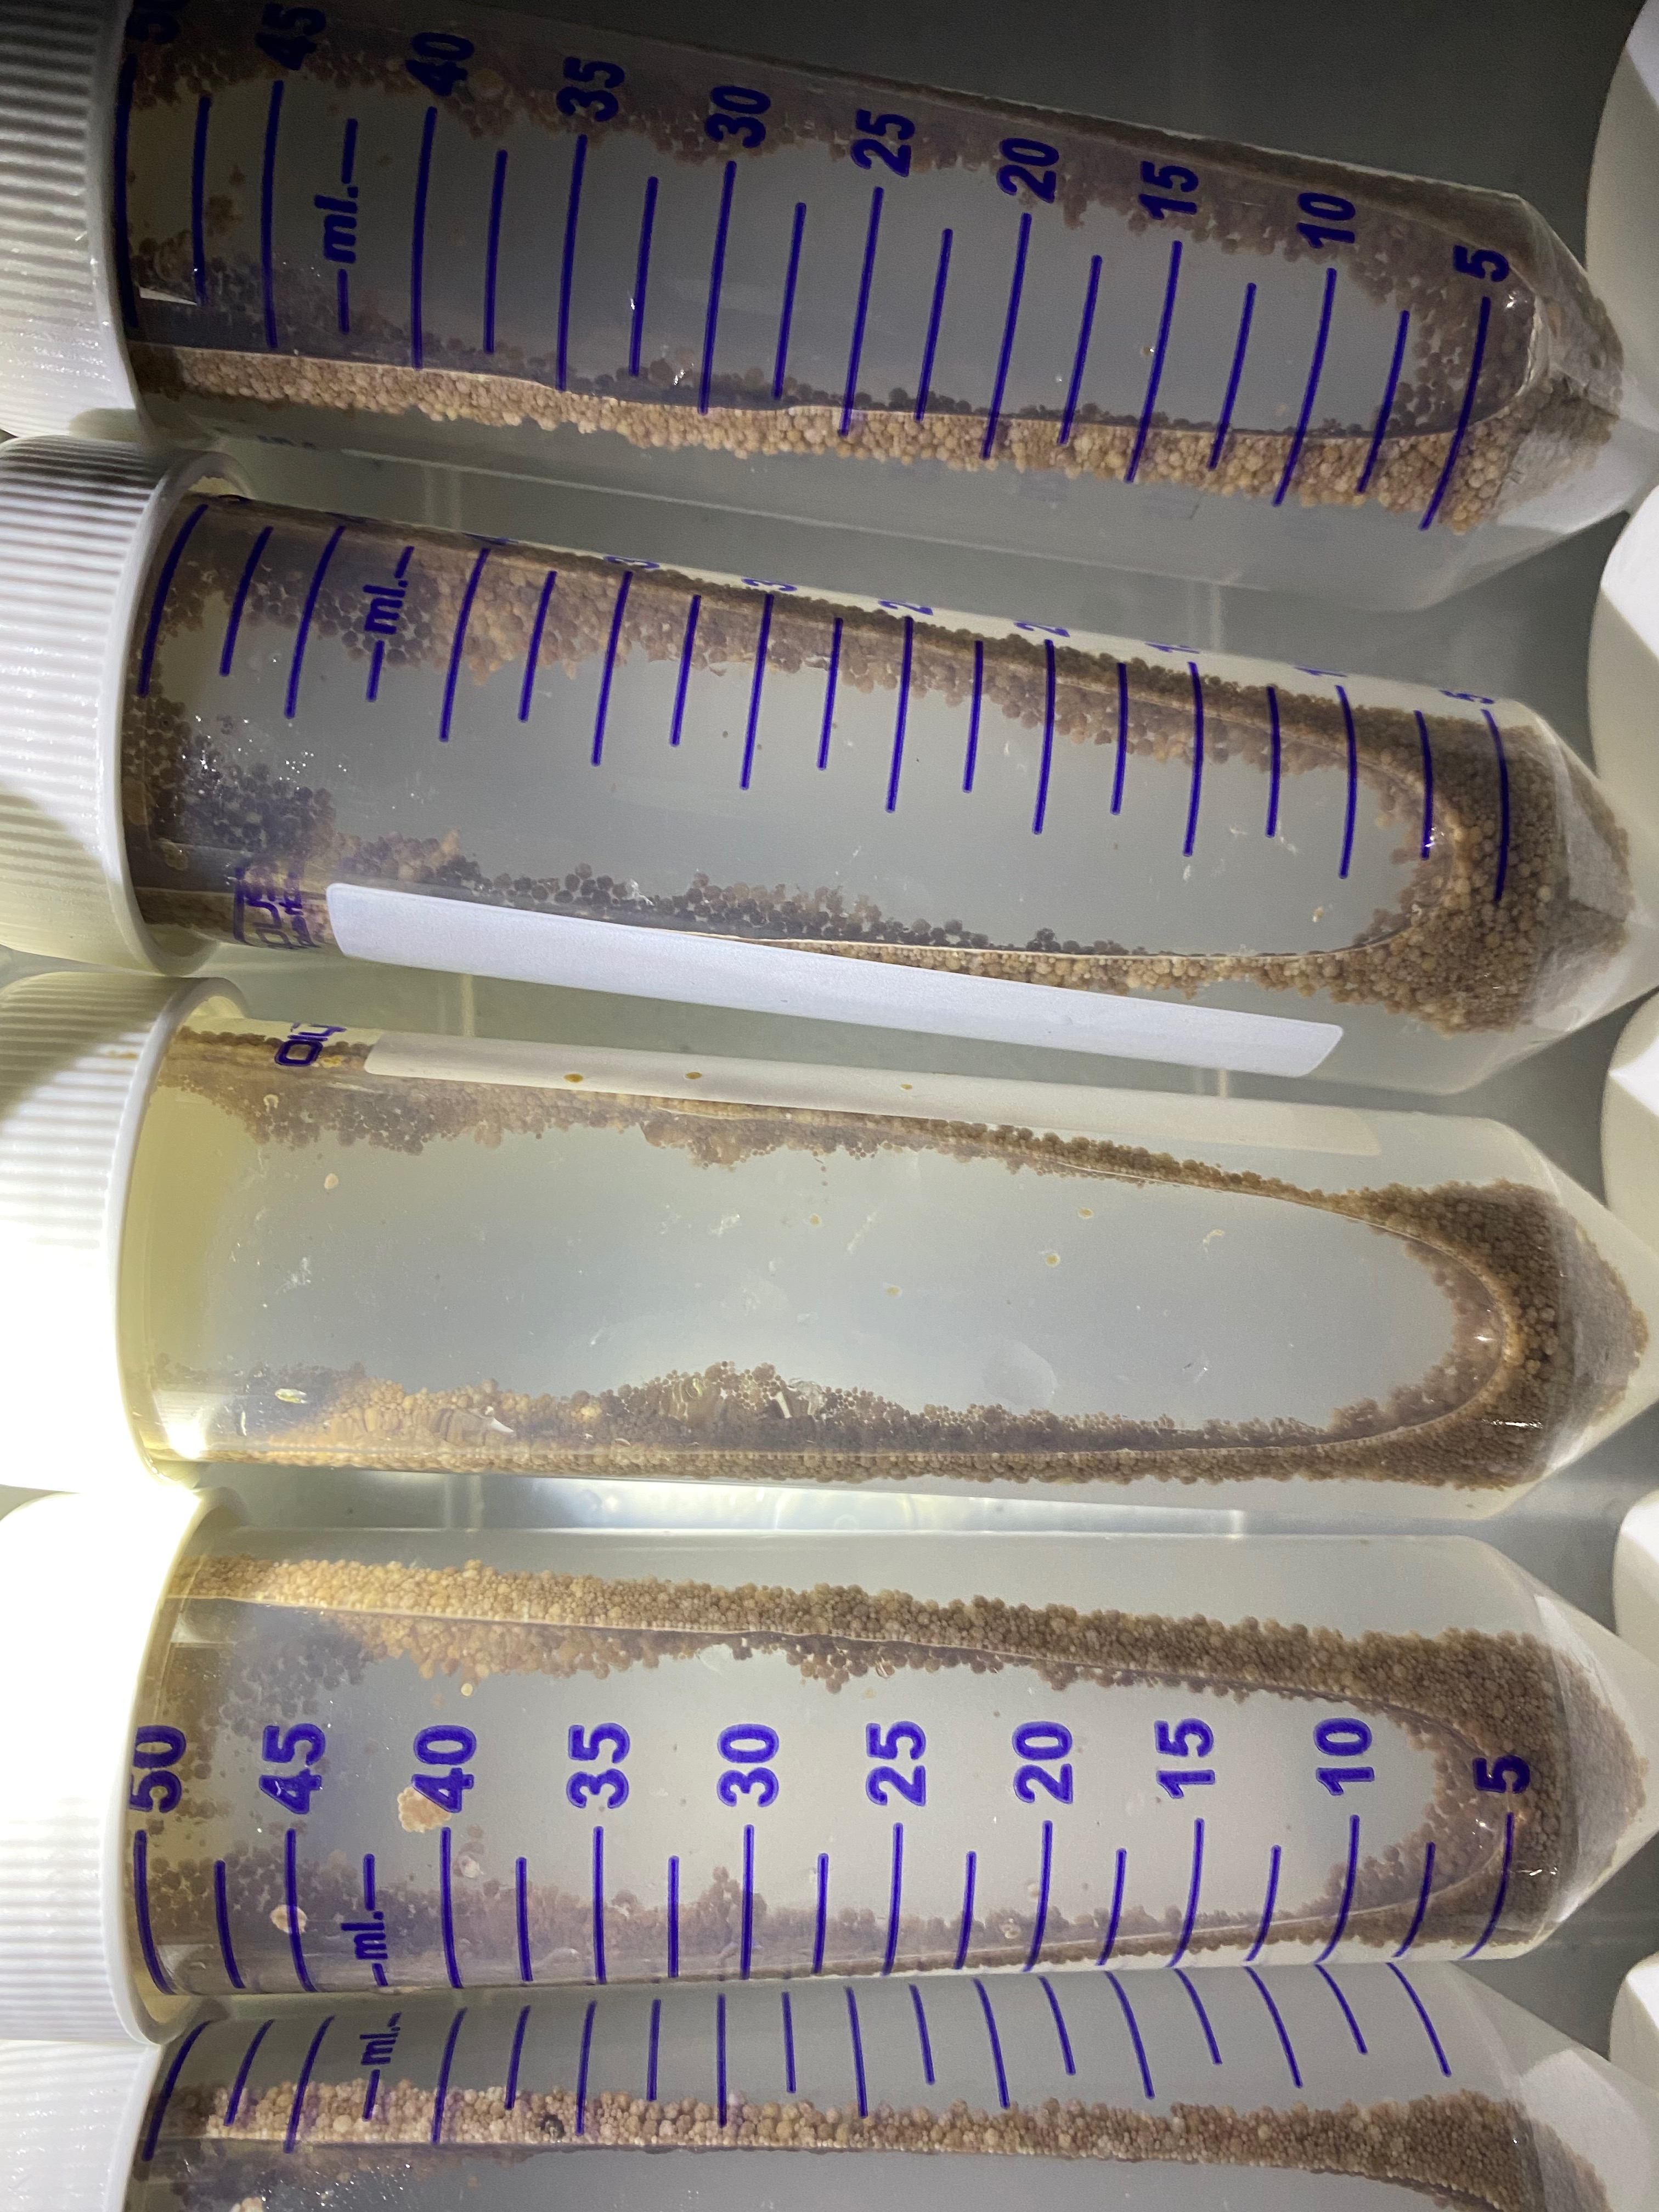
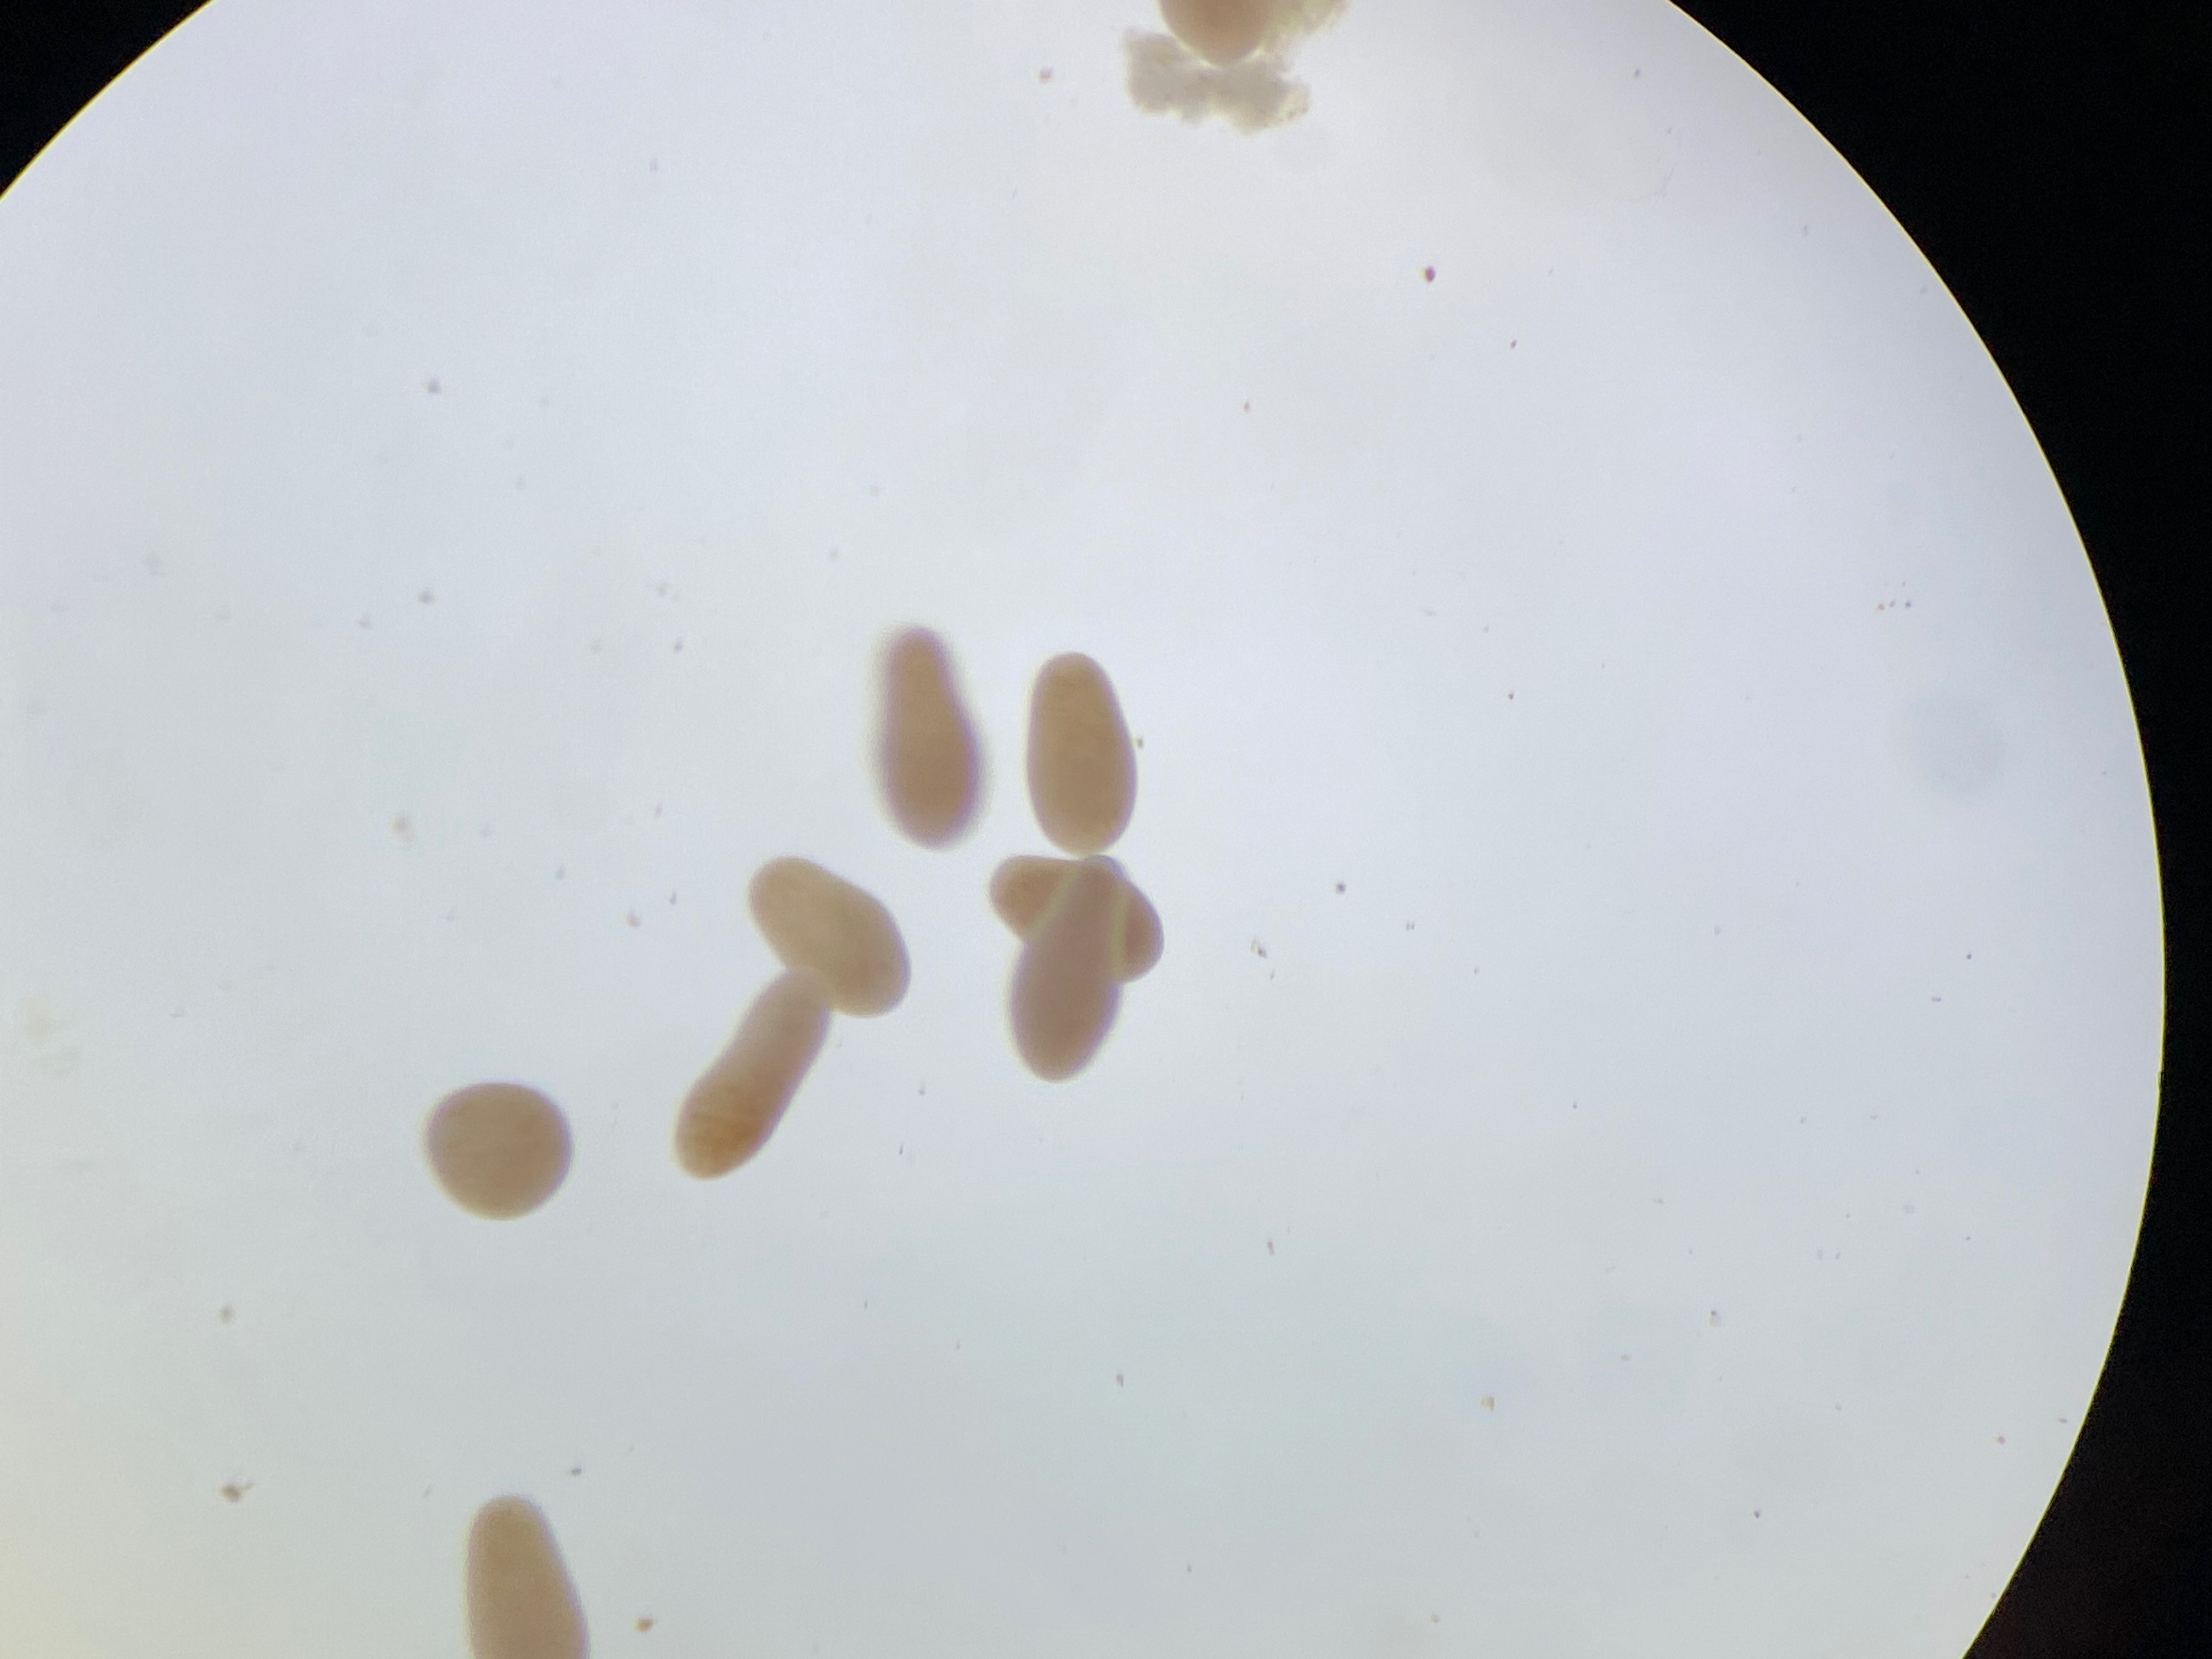
- Allow eggs to fertilize until all bundles break apart (40-70 minutes, generally around 11:00pm). The water will look cloudy at this stage as it contains concentrated sperm debris, and fertilized eggs.
- The fertilized eggs are positively buoyant and will float. Gently turn the falcon tubes right side up and allow the eggs to float to the top. For each falcon tube, gently remove the cloudy water from the tube with a turkey baster or serological pipette. Do this by slowly inserting the pipette through the eggs and down to the bottom of the tube.
- Draw up the sperm water, removing as much as possible without removing eggs. Gently remove the pipette and discard the sperm water. If the water is particularly dirty, you can very gently and slowly add ~10-15 mL of new FSW and repeat the process. Do this as few times as possible, preferably just once to avoid handling the eggs too much.
- The eggs are now ready to add to a squarical. One falcon tube can be added to one 20-25L squarical or one 5-gallon bucket. Do not overload the containers with too many gametes. If you have extra falcon tubes, load them into extra buckets. Add the gametes to the containers by very gently and slowly pouring the fertilized eggs into the container such that they float into the container and don’t drop/splash. Be very gentle at this stage.
- Once added, use a transfer pipette to very slowly and gently stir the eggs to redistribute them around the squarical/bucket.
3. Embryo and larval rearing
- Load the fertilized eggs into the squaricles, or any other container depending on the experimental set-up. One falcon tube fits one 22L-squaricle as described above.
- Each squaricle must contain a banjo filter with mesh (153um) to cover the drain and avoid losing the embryos.
- For the first 2-3 hours, keep water flow off. After 2-3 hours (around 2:00-3:00am), start water flow SLOWLY. The water flow should be turned down to each conical such that the water is dripping out slowly (1 drop every second or so). Place the water flow tube at the bottom of the squarical.
- After ~12 h, the water flow can be slowly increased. Water can slowly be increased every 12-24 hrs. If the water looks dirty, you can turn the flow up slightly more.
- Cover the squaricals, especially at night to prevent any rain from killing the embryos.
- Every 1-2 hours for the first 48 hours, check on and stir/clean if necessary. These are the steps for checking the larval cultures during this period.
- Visually assess the culture. Are the embryos intact? Do you see large spots of decay (white patches)? Are the embryos accumulating in the corners/edges? How dirty is the water? Is there a lipid film on the water?
- Use a transfer pipette to manually remove any white areas of decay. These look like white rings with degrading embryos.
- After removing the dead spots, gently use a transfer pipette to stir the embryos to keep them from accumulating in corners. When embryos accumulate in large groups they are more likely to decay due to lack of oxygen.
- Use a transfer pipette to gently push embryos/larvae off of the banjo filter. Do this by using the pipette to gently push them off using “puffs” of water.
- ONLY if you see a lipid film on the water, use 1-4 kimwipes to gently skim across the surface of the squarical. This will pick up the lipid film. A few embryos will also be removed, so only do this if needed. If the conical is particularly dirty use more kim wipes.
- Gently stir the water in the squaricle every 1-2 hours for the first 24 h. The time in between cleanings can be slowly increased as they develop. Embryos will start to grow and develop into larvae within 3-5 days post fertilization.
- Water flow needs to be kept low during the first 24 hours, and gradually increased between 24 and 72 hours. As the embryos become swimming larvae, you can increase the flow.
- Daily, take a small sample from the cultures to examine under a microscope. After 3-6 h post fertilization you should see cleavage. Continue to check them daily to become familiar with the developmental stages.
- Continue with these checking/cleaning of the embryos throughout development. Once they are swimming larvae, cleaning can be reduced to 1-2 times per day.
- If the culture crashes (high mortality) or is extremely dirty, you can drop the entire culture. These are the steps to do this. ONLY do this if absolutely necessary as it can damage the embryos.
- Prepare supplies: bowl, 153um sieve/mesh, 5 gallon bucket, tubing, two people, turkey baster, transfer pipette, and squirt bottled filled with FSW. Set up supplies such that the tube will go from the squarical into the sieve which is held over a bowl such that the embryos will be submerged while you are draining the squarical. Set up the bowl over a 5 gallon bucket to catch the dirty water which can be dumped afterwards.
- One person will hold the siphon tube in the squarical and use the pipette/baster to gently rinse all embryos off the sides of the containers and banjo filters as the squarical drains. The other person will hold the tube in the sieve and hold the set up over the bucket as it drains. The sieve will catch any larvae/embryos. It is CRITICAL to keep the sieve partially submerged to contain the larval while making sure they stay in water at all times so that they do not get damaged on the sieve.
- Start the siphon and drain the squarical.
- One person will hold the larvae in the sieve while the other will quickly rinse out the squarical and wipe it down with kim wipes. Fill the squarical back up.
- Once the squarical is full, turn the water back to the correct level and use the squirt bottle to gently rinse the larvae out of the sieve back into the squarical.
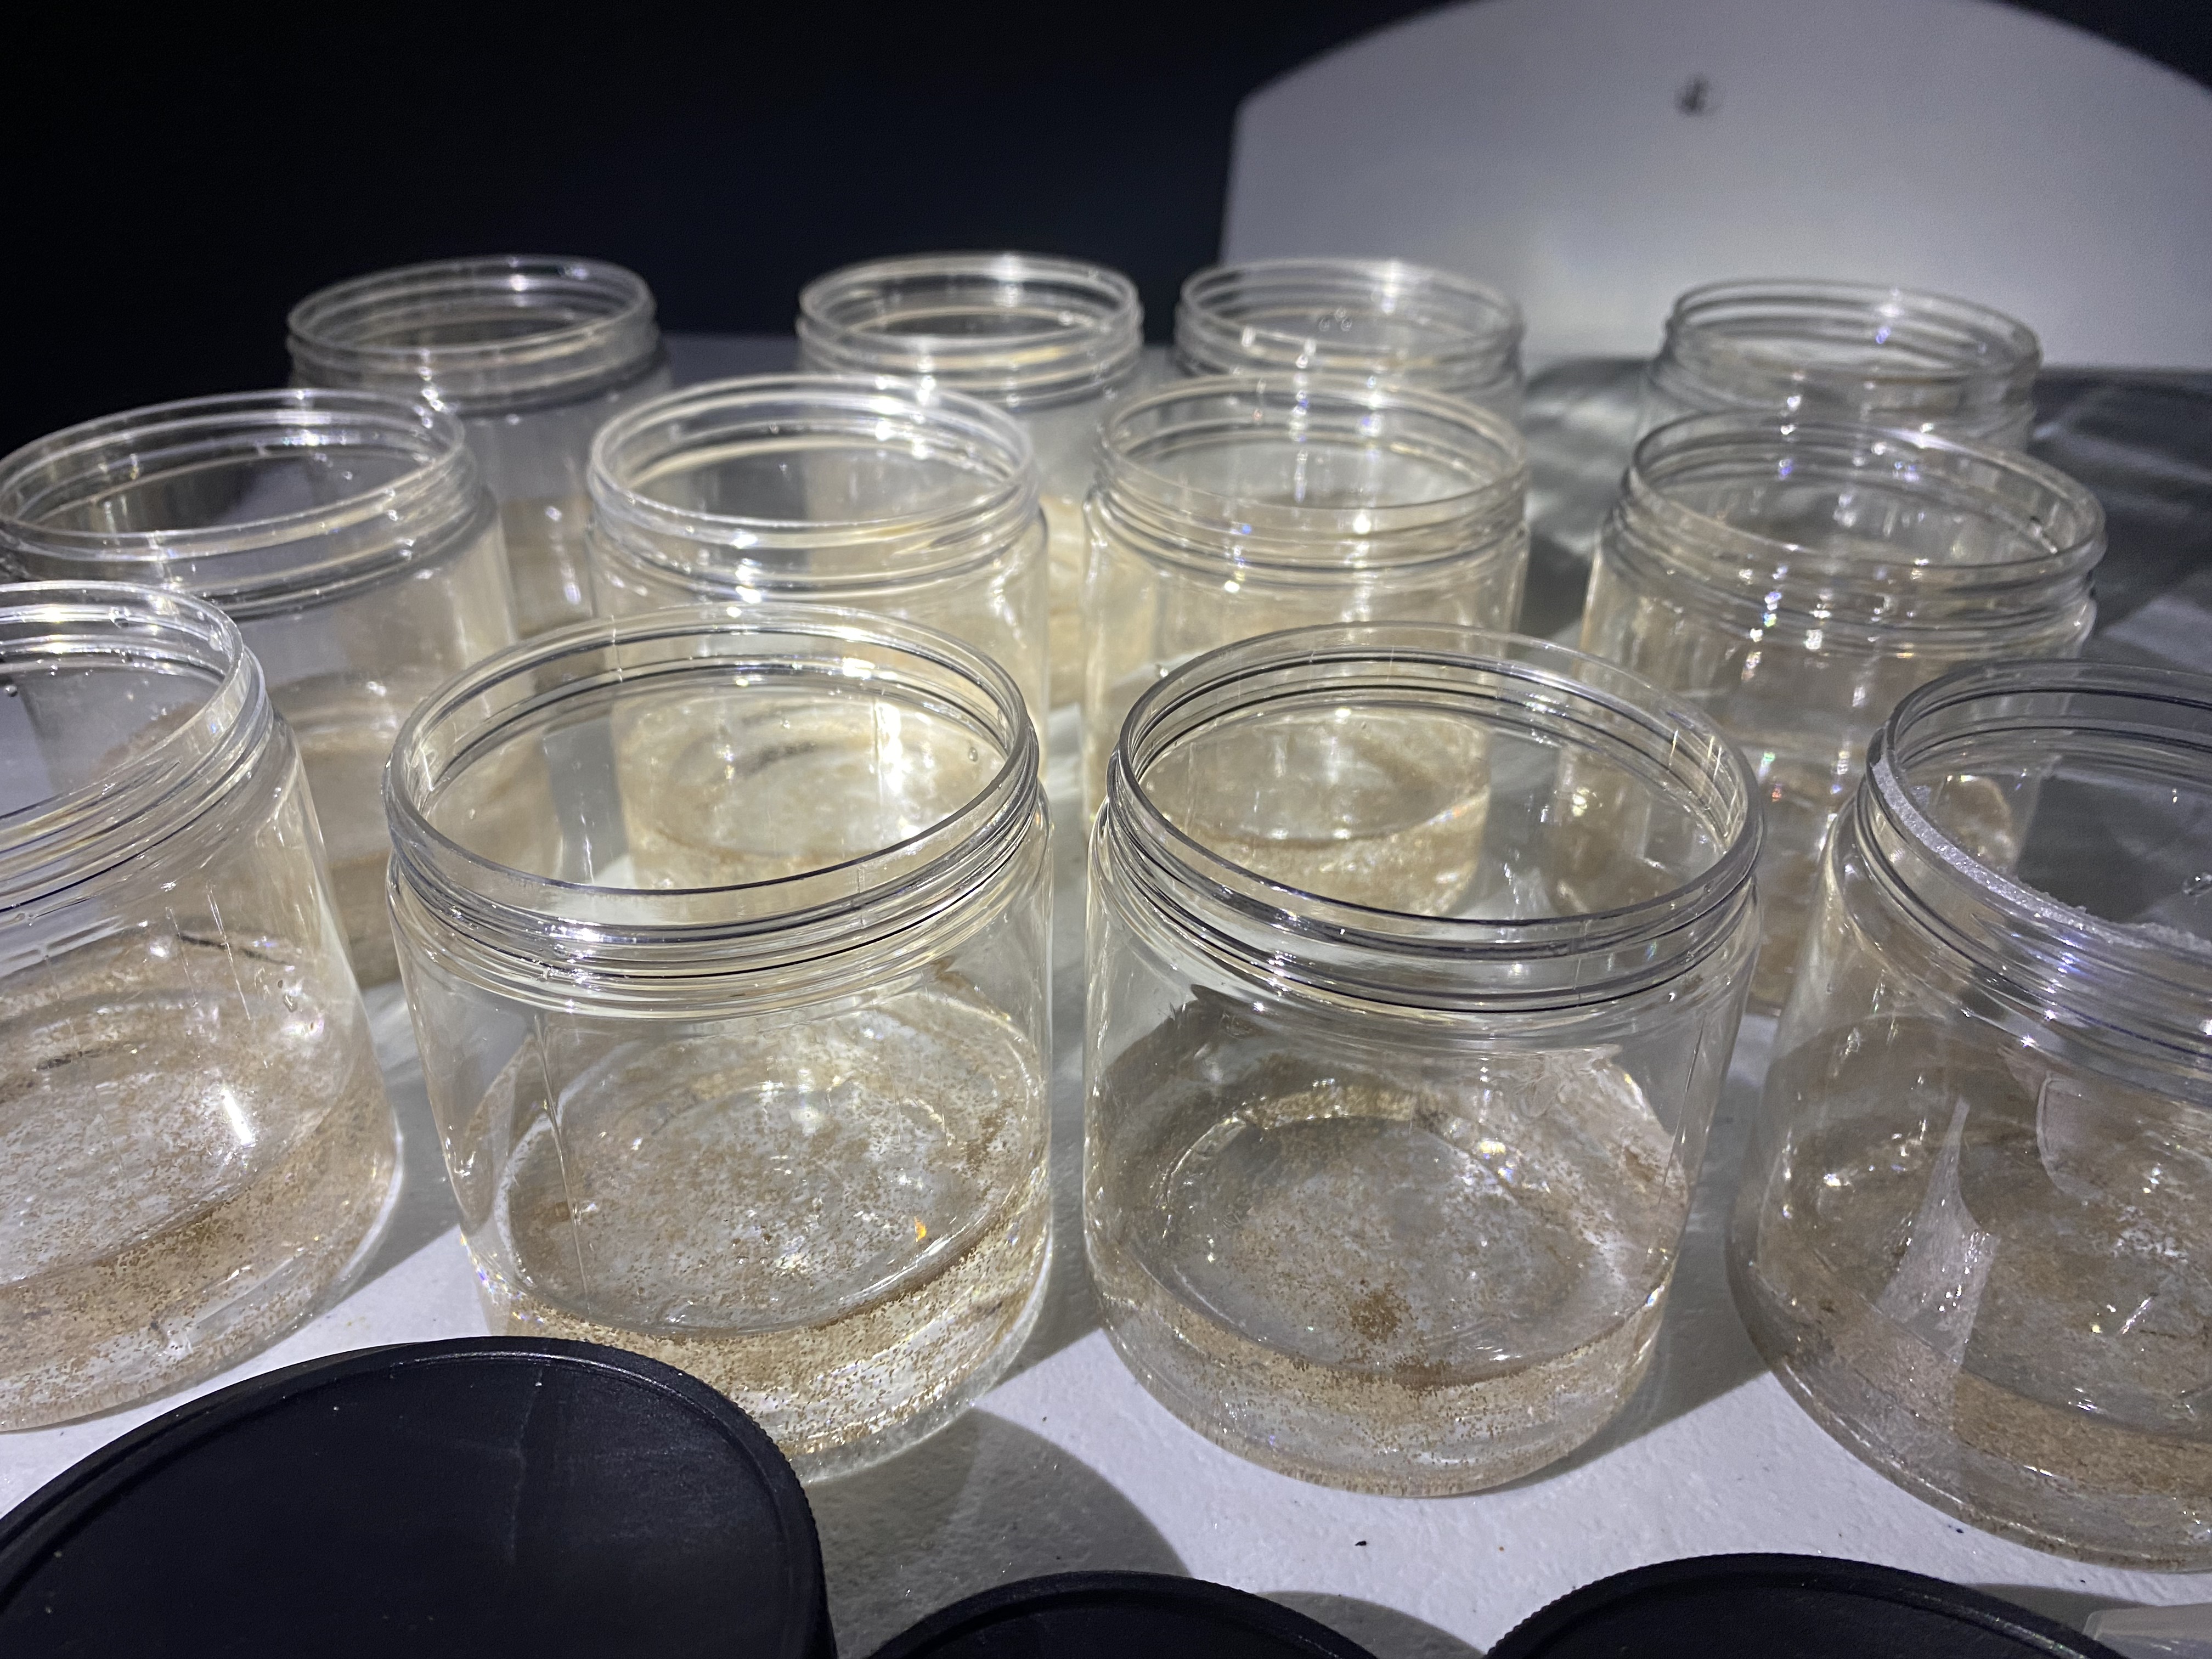
- If you want to sample all the larvae rather than put them back in the squarical, pour them instead into a smaller jar/bucket.
5. Tracking larval survival
- Larval survival can be tracked to monitor larval densities, monitor larval survival as a response variable, and ensure that enough larvae will be available for final sampling.
- Measure survival by gently mixing larvae in the squaricles to evenly distribute them and taking n=3-6 subsamples of a known volume. Aim to have 30-50 larvae in these samples. Typically, a sample of approximately 20-30mL is sufficient using this protocol. Collect the samples with a serological pipette and place into a jar or collection container.
- Count larvae in each sample and return them to squaricles. Record the number of larvae, time and date of collection, and sample volume on a data sheet.
- Provide measurements of larval density at each sampling time point as larvae per mL. To calculate the total number of larvae, multiply larvae per mL by the total volume of the container. For example, 1 larvae per mL x 25,000 mL (25 L) = 25,000 larvae. Use this calculation if you are using larval containers of different volumes.
4. Settlement
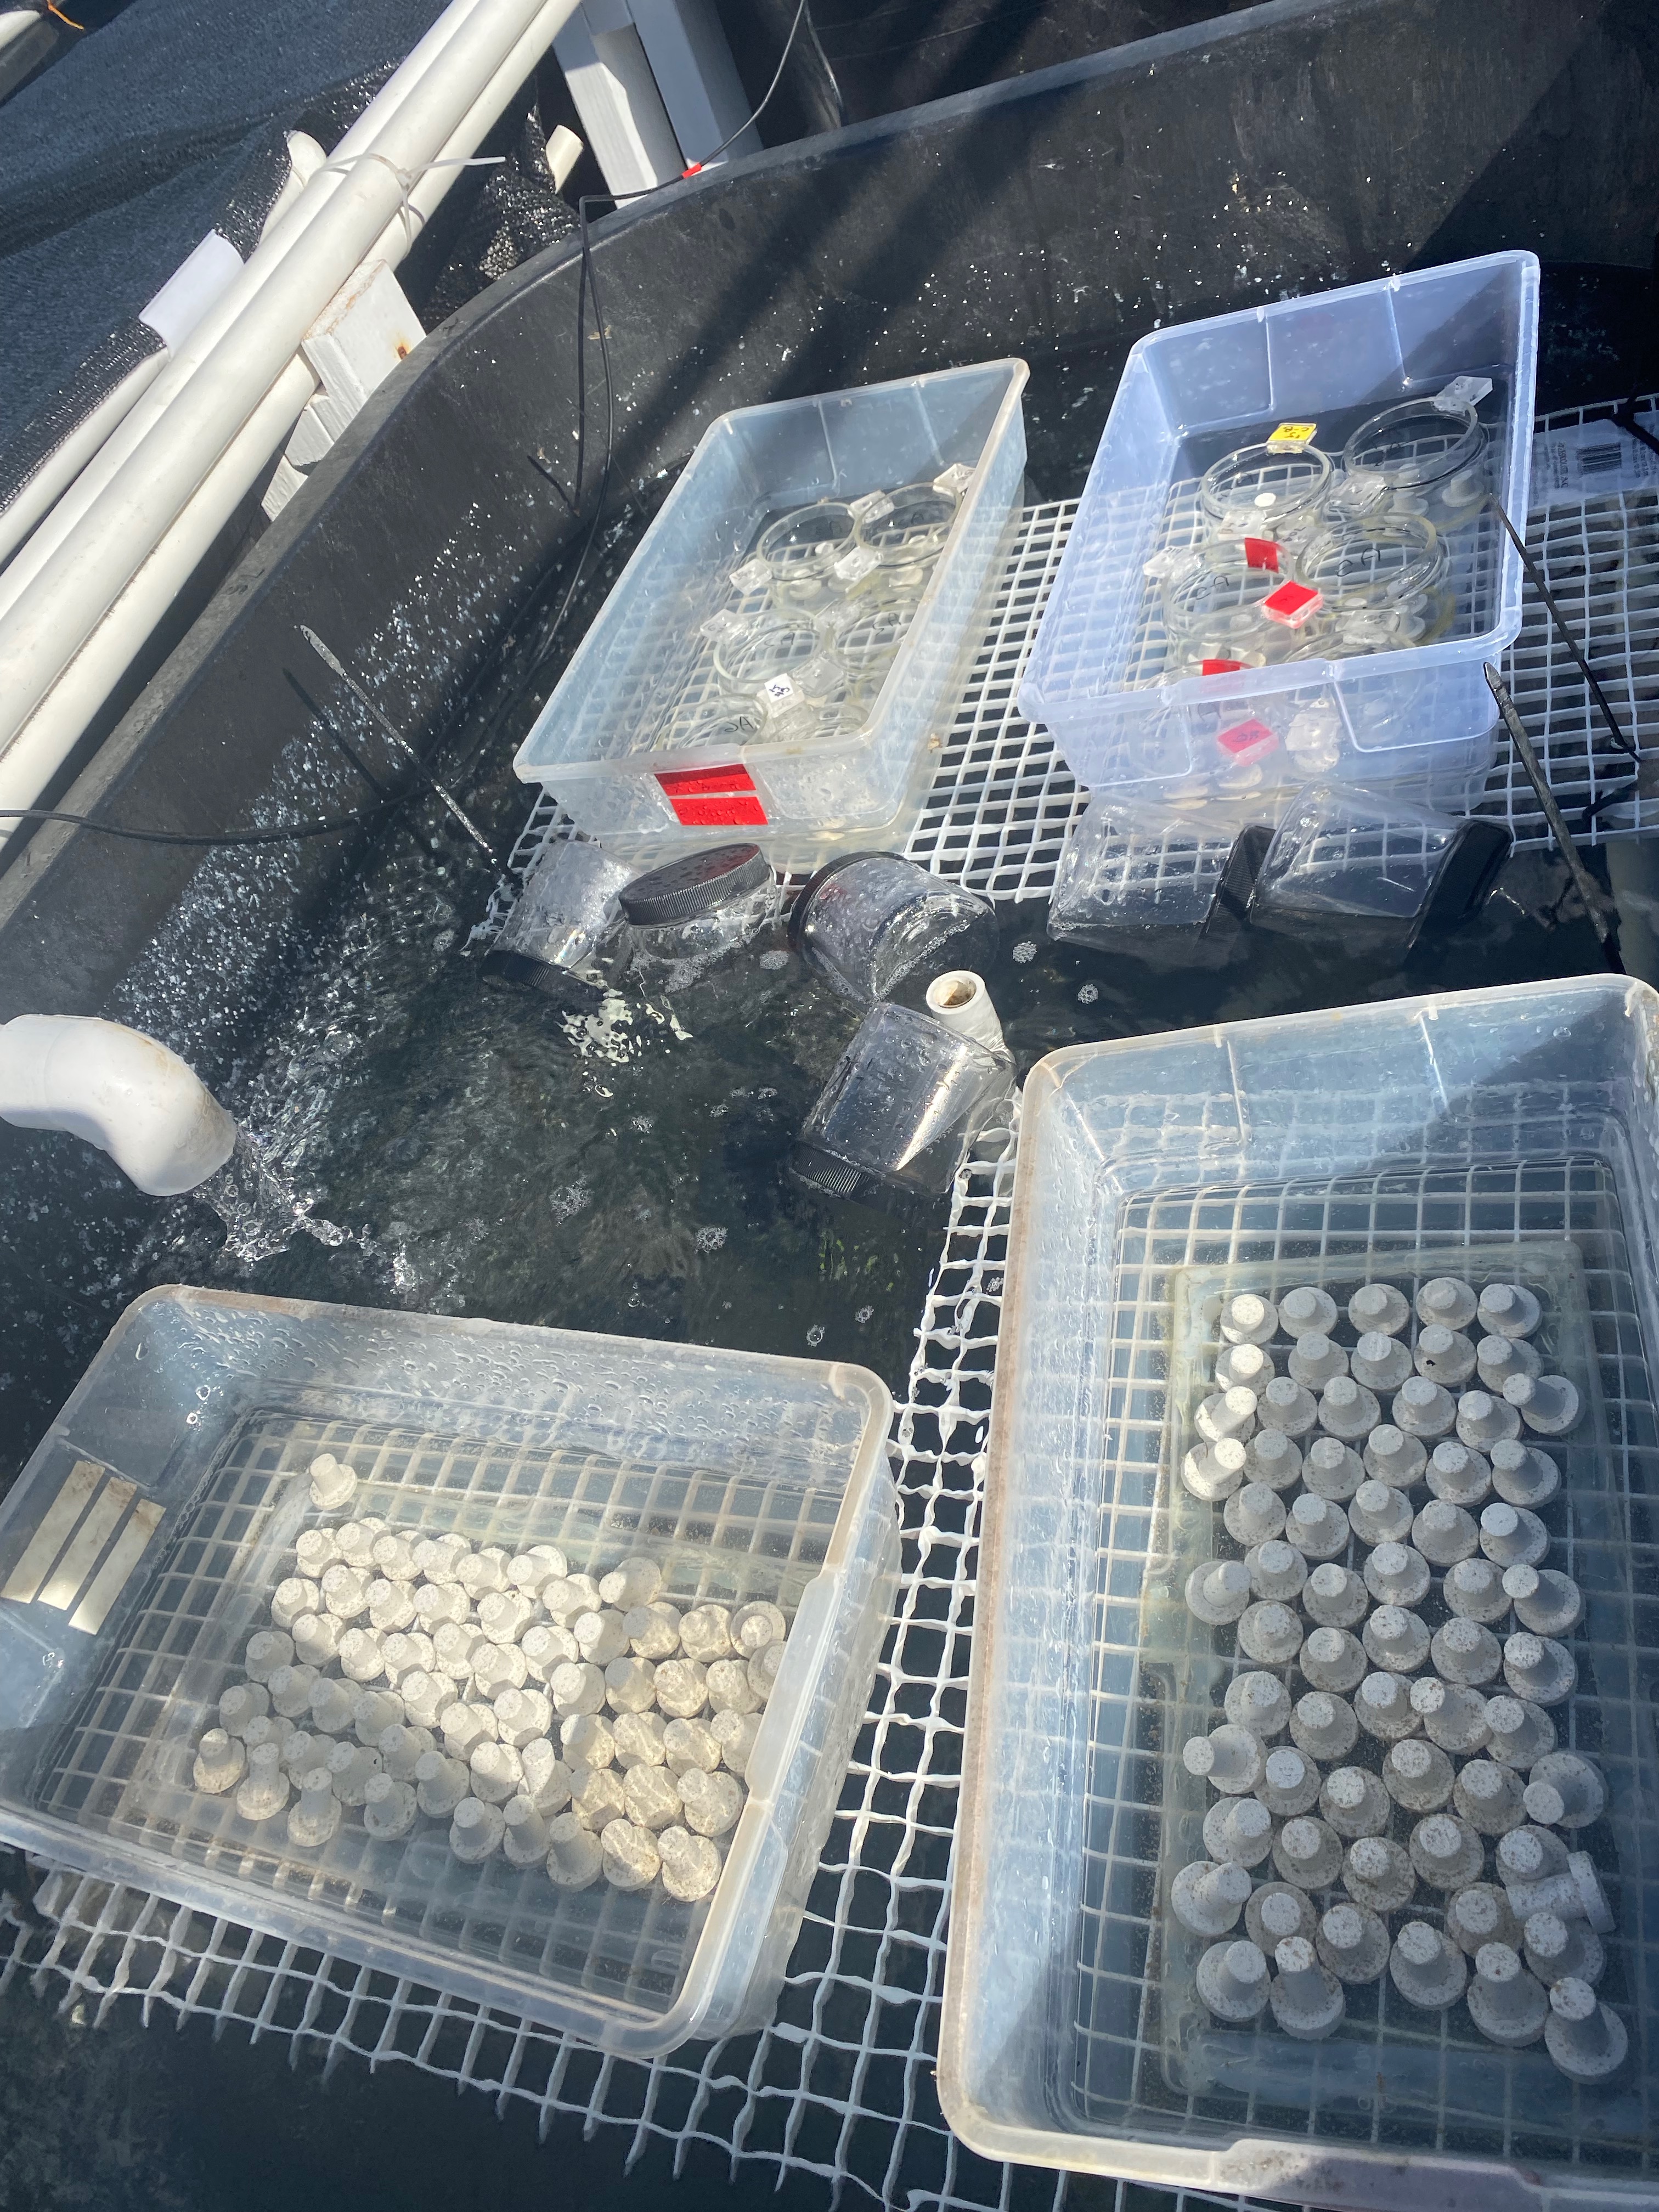
- After ∼1 week post-fertilization, swimming larvae can be transferred into mesh-bottomed settlement chambers (made from plastic tupperware and 153um mesh).
- Chambers should be shaded from direct sunlight (replicate your previous light conditions from larval development).
- Place settlement substrate such that the substrate is upside down on the mesh. Put the mesh containers in the desired treatment/tank conditions such that they are partially submerged to contain larvae. They can be placed on racks or in shallow tanks elevated so that water can exchange through the mesh.
- Settlement substrate includes tiles, plugs, live rock, aragonite plugs, water proof paper, plastic plugs, etc.
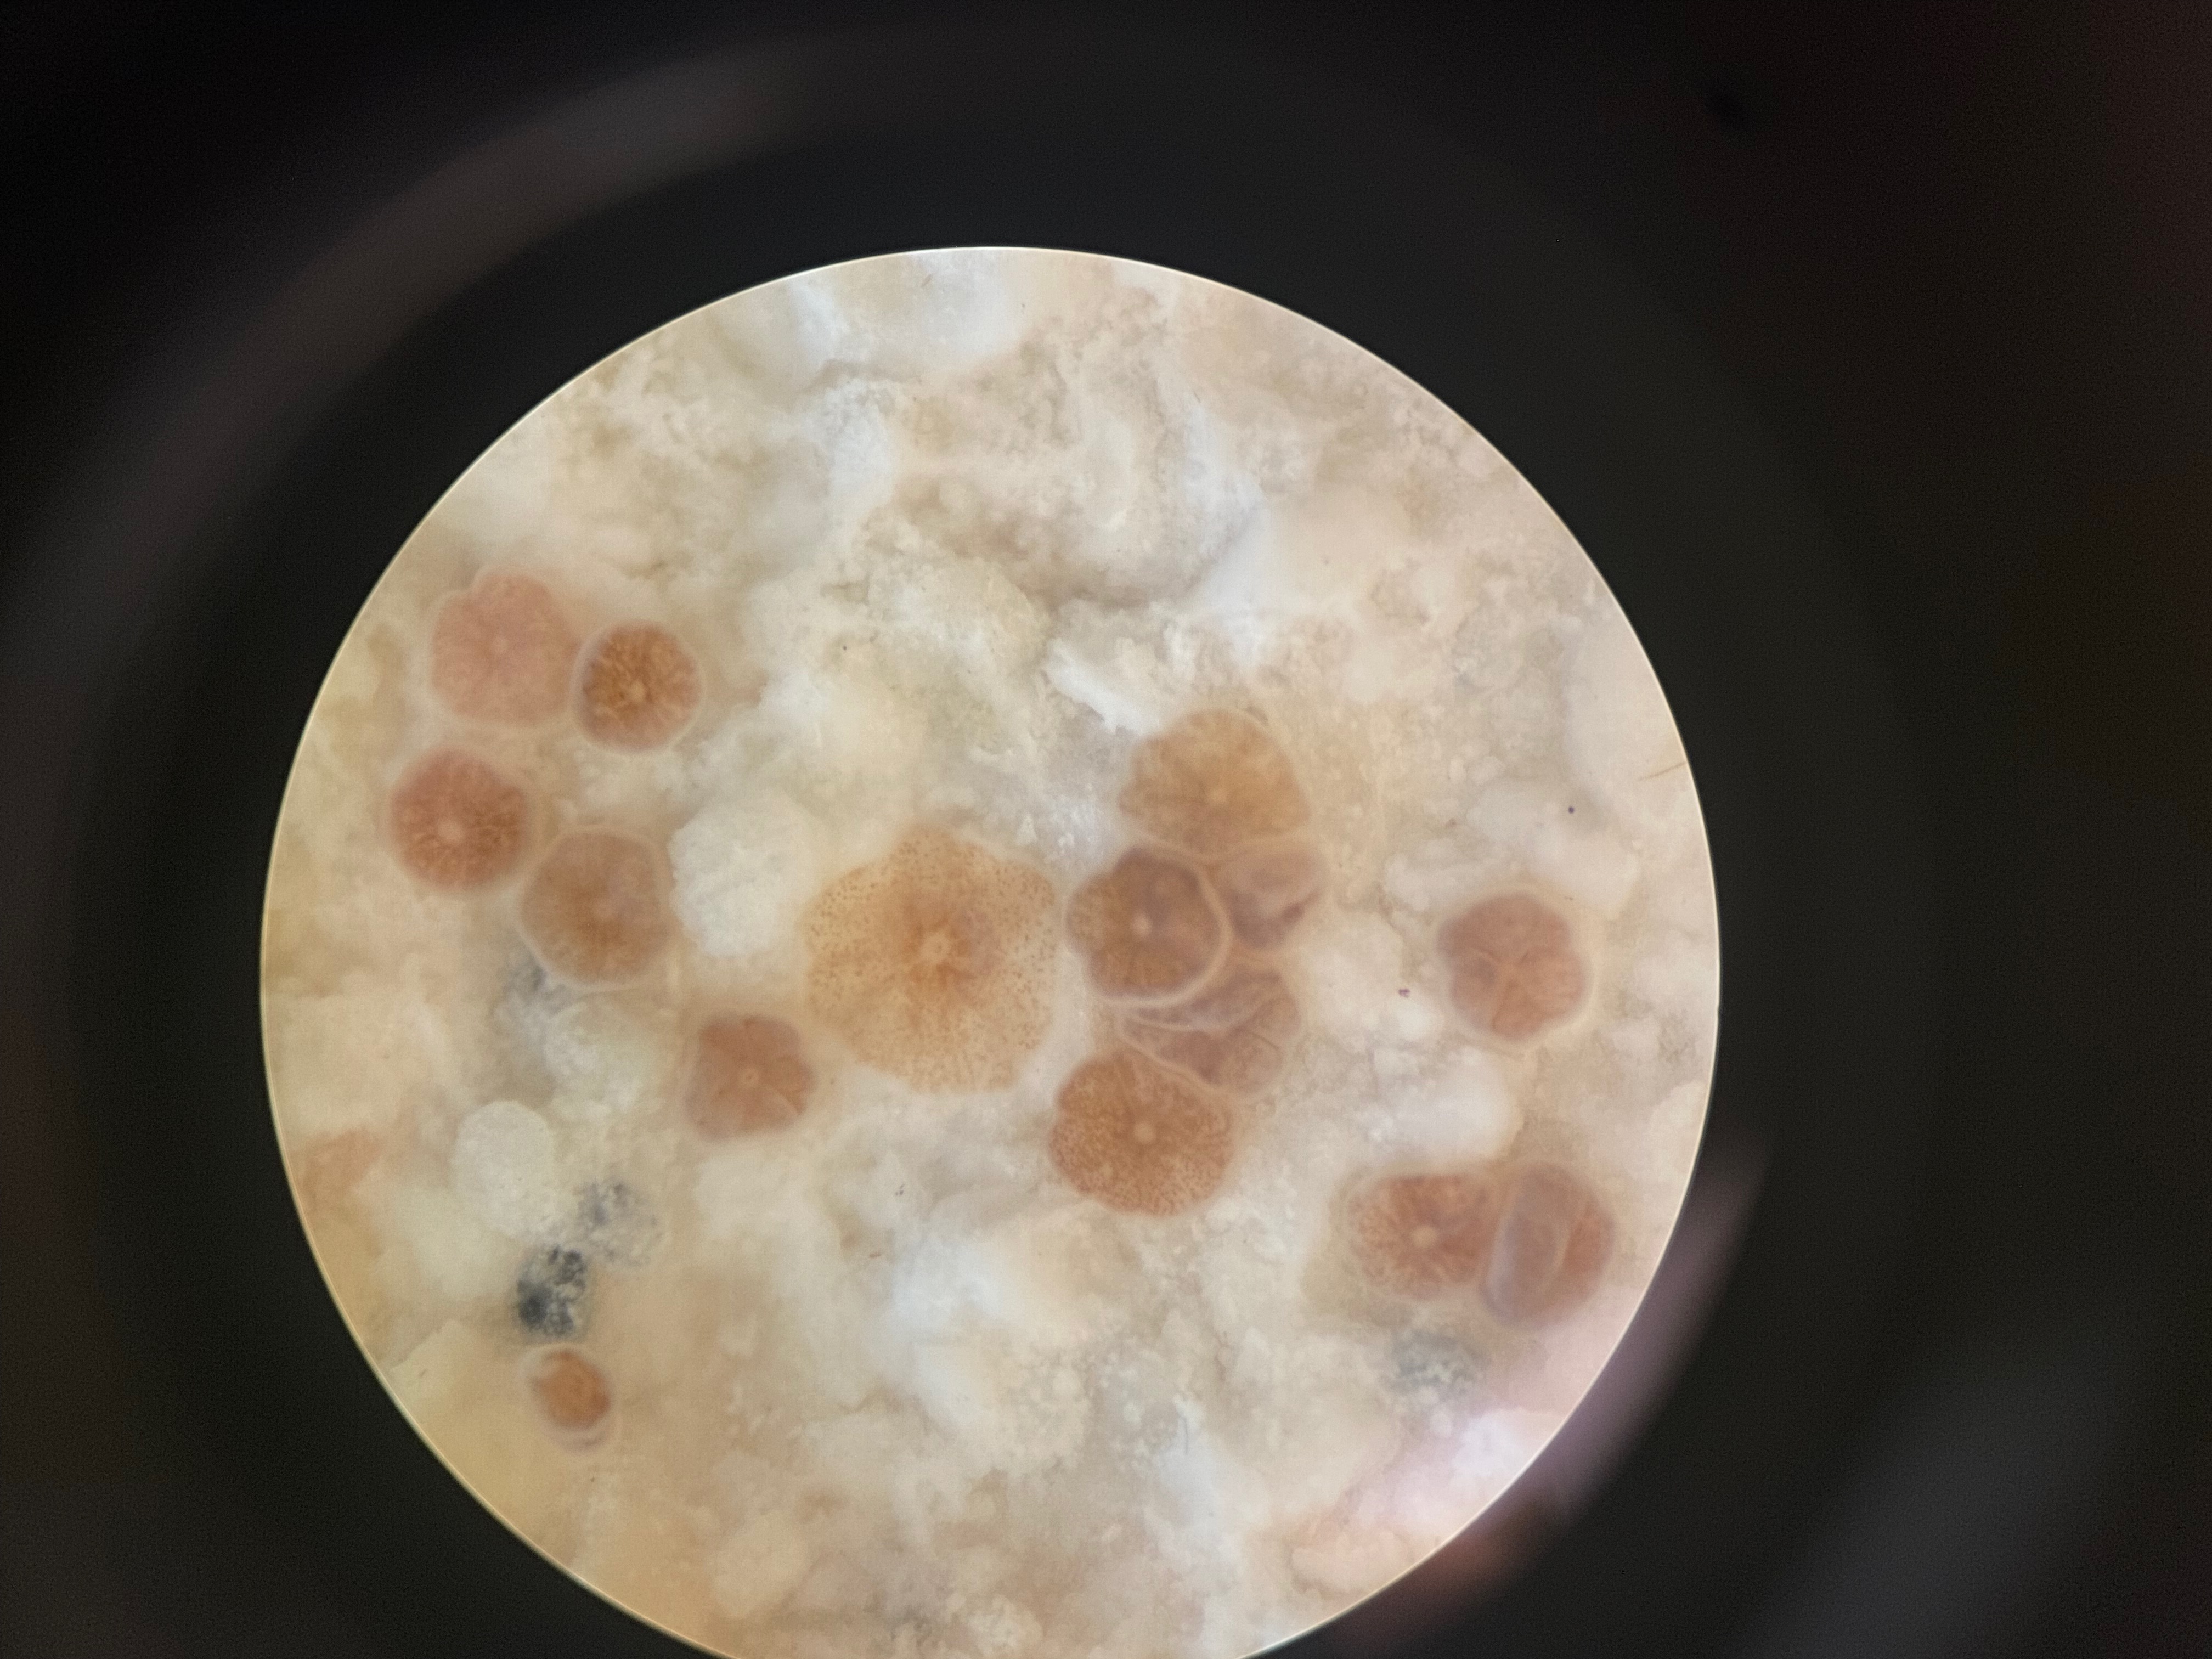
- Use large containers with many plugs for bulk settlement (50-150 larvae per plug) or smaller chambers for controlled settlement trials. To measure settlement, count the number of larvae you put in each chamber (e.g., 100 larvae). Each day or at desired time intervals, count the number of settlers you see on the substrate using a dissecting microscope.
Written on July 20, 2022