

SDR Microplate Respirometry Protocol
This protocol details the step-by-step use of PreSens/Loligo Microplate respiration system for coral larvae.
Larval photosynthesis and respirometry protocol using SDR microplate
Original protocol written by Ariana Huffmyer and modified by Jill Ashey and Federica Scucchia (Hawai’i June 2022)
Also see the Putnam Lab SDR protocol.
1. Prepare equipment
- PreSens Oxy-10 Sensor Dish Reader (SDR) in combination with Loligo 24-well microplate (80 µL each well)
- Glass coverslips
- PreSens software downloaded with calibrations entered as provided by manufacturer
- Aquarium lighting Prime 16HD AI
- Digital Incubator MyTemp mini
- Filtered seawater (1 µm)
- MilliQ filtered water
- Bubbler and aeration
- Glass Transfer Pipets
- PC computer
- Kimwipes
If you are conducting respiration measurements in bench top incubators, follow these steps:
- Drill a 1” hole in the right side of the incubator and put the incubator trays at the bottom.
- Zip-tie an AI light inside the incubator at the top. The AI light power cord should run out of the hole in the side of the incubator
- Place hobo logger on the floor of the incubator for temperature measurements
- Plug the light in and using the app, set the light levels so that all are at 30% and 0% UV light
- Unbox the SDR and separate materials into SDR1 and SDR2
- For each SDR set, you should have:
- Presens power box
- SDR connector box
- Loligo 24-well microplate
- Presens Oxy-10 Sensor Dish Reader
- Connectors
Note that light is only used for photosynthesis measurements, but keep in mind that the oxygen spots are highly variable under light and we recommend measuring photosynthesis using sensor probes or other options in which the oxygen spots are not upward facing.
2. Prepare larvae
- Take larvae out of the squaricals and rinse them in filtered seawater to clean any debris off of them
- Based on previous respirometry trials by AH, 5 P. acuta larvae per well or 6 M. capitata larvae per well will give consistent signals
- Use a glass transfer pipette to transfer some larvae into a 6 or 24 well plate and separate them out so you can get 5-6 larvae. Count them and put them into small “bubbles” of water.
3. Calibrate oxygen spots
- Start by hydrating sensors in the wells ~20 minutes before using the plate with filtered seawater.
- After hydration, fill the wells with 100% air saturated filtered seawater, which was aerated for about 20-30 minutes with the bubbler.
- Place the 24 well plate on the SDR inside the incubator
- Open the PreSens software, log in with username “admin” and password “admin”.
- Make sure the SDR is connected to the computer.
- Select “Connect SDR” and you should see SDR 710 and SDR 641 show up.
- Select one of the SDR tabs.
- Select “Oxygen” from the drop down menu. Select PSt5-1624-01_25C under Batch No.
- For each SDR (either 641 or 710), enter the correct Meas. Temp. C depending on what incubator it is in and what temperature the incubator is currently at.
- Enter salinity in psu for the salinity for both SDRs.
- Select pO2 (%air sat) under Oxygen Unit.
- After these data are entered, select one SDR tab.
- Click the calibration menu and select One-Point Adjustment
- Enter 100% at the bottom and click “OK”
- Perform this calibration at the start of each new temperature level.
4. Prepare plates and metadata
- Before preparing larvae, turn on the incubators and lights to the desired temperature and level to allow the incubator to come to temperature. Set the lights at desired intensity to achieve desired PAR. Measure the light at the level of the SDR plate and record.
- Place a cover over the doors of the incubator to block ambient light.
Note: Only use kimwipes and be very gentle and careful with the plates. Be careful not to touch or scratch the oxygen sensor spots in the bottom of each well.
-
Before starting trials, set up a plate map using the plate map template and a metadata file example here.
- Include 2-3 wells to serve as blanks, loaded with filtered seawater. Record the location of blanks on the plate map and record NA on the plate map for any wells that are missing sensors. Change the location of blanks in each run. Well sensors need to be hydrated 20 minutes before loading the larvae as specified above.
- Take 5-6 larvae (5 larvae recommended for P. acuta, 6 larvae recommended for M. capitata) with the glass pipette and put them in a petri dish. Take out the excess water with the pipette, to leave the larvae with the smallest possible volume of water
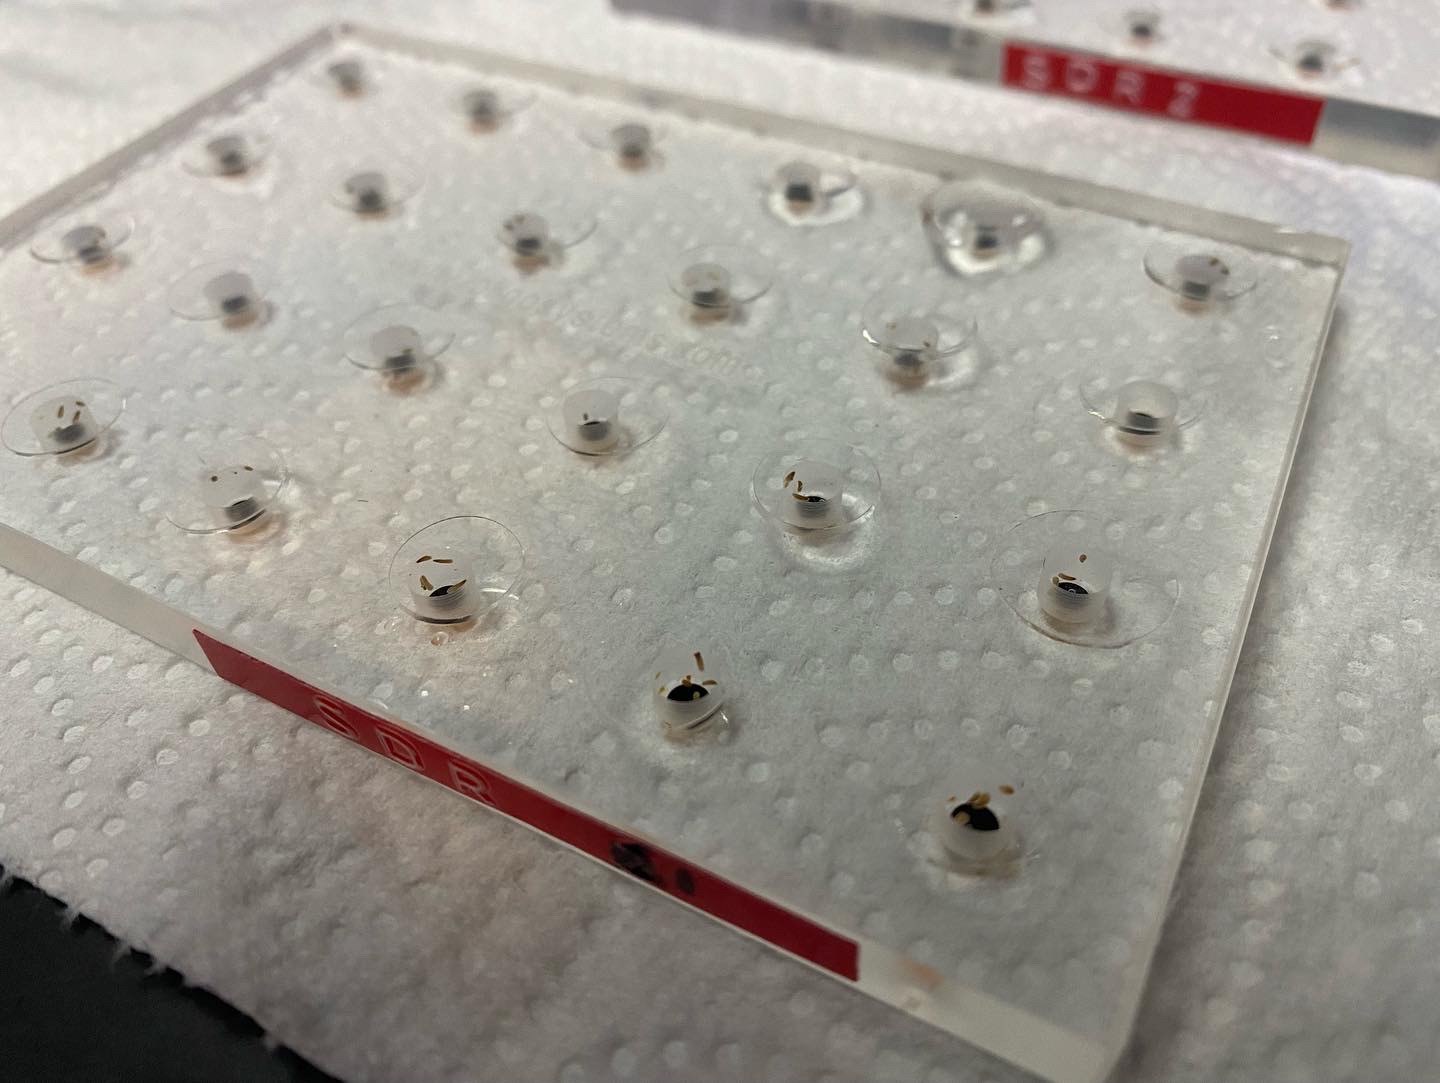
- Put the larvae in the wells, add a final drop of filtered seawater to fill the well so that a convex meniscus forms and the water tension holds a tiny bulge slightly above the top of the plate. Ensure the plate is very dry to allow for this tension to form. If the plate is too wet a bubble will not form. If you need to refill or reset a well make sure to dry it with kimwipes.
- Check the well for bubbles and pipette up and down gently to remove if needed.
- Make sure all larvae are within the well.
- Carefully drop a micro coverslip over each well to seal it. It’s best to drop the coverslip gently, and at an angle to the well plate.
- Check to make sure there are no bubbles in the wells.
- Put the plate on the SDR in the incubator. Make sure the oxygen sensors are right on top of the readers on the SDR. 1
- Ensure that A1 is aligned between the plate and the SDR.
- Check the temperature in the incubator with the digital thermometer regularly and launch hobo loggers to log temperature during the run.
5. Photosynthesis and respiration measurements
- For both SDR tabs, press “Log measurements”. The software will ask to save the file before starting the run. Save the file in the Hawaii 2022 folder on the PC. Name the file with date, run number, temperature, and initials.
- Make sure the lights are on and the temperature is correct. Once a measurement has been logged for both SDR’s, you can click START.
- Start the run with the light on for photosynthesis measurements (~30-40 minutes).
- Then turn off the light for light-enhanced respiration measurements (~20-25 minutes).
- Record start and stop times and the time the light was turned off. Record any notes on wells that have bubbles or other issues.
- You should see a general increase in photosynthesis rates and a decrease in respiration rates. The respiration rates will be much more stable than the photosynthesis rates due to the effect of light.
6. Close and save data
- At the end of the run, press “Export measurements” to save the data. Do not press close measurement before exporting!
- Save using the same naming as you did to log the measurements. Upload data sheets to the google drive or save onto a USB.
7. Clean equipment
- Use a glass pipette to remove the water and larvae from the wells GENTLY.
- Rinse the microplate with milliQ water and dry using a kimwipe. Roll the kimwipe up and gently dry each individual well being careful not to damage the spot.
- Because the oxygen spots are sensitive to light, put it in the bubble wrap and put it in the dark bag. Open the bag slightly so the plate can fully dry.